 Reviews



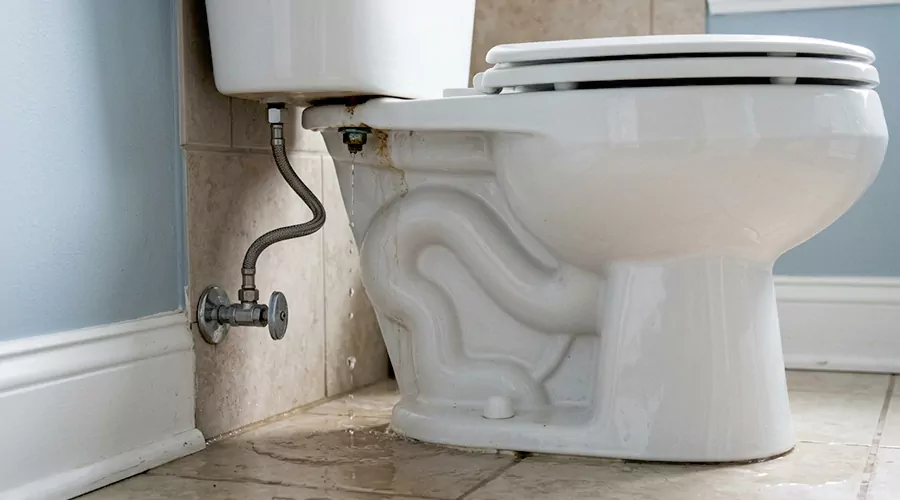
A toilet leaking from tank bolts usually has worn rubber washers or loose sealing hardware, and a 2026 tank-bolt repair can cost about $45 to $350. The rubber washer inside the tank creates the watertight seal. Tightening the metal bolt alone does not repair damaged rubber.
A toilet leaking from tank bolts needs careful handling because excessive tightening can crack the porcelain. The first goal is to prove that the water actually starts at the bolt. The tank-to-bowl gasket can create a nearby leak that looks almost identical.
Why Do Toilet Tank Bolts Start Leaking?
Tank bolts leak when the rubber washer around the bolt no longer seals the hole through the tank. Rubber can harden with age. Tank movement can also loosen the hardware. Corrosion creates another problem because damaged hardware may no longer compress the washer evenly.
- A two-piece toilet normally uses bolts to secure the tank to the bowl.
- The bolt passes through a hole in the porcelain.
- A rubber washer sits inside the tank.
- That washer keeps standing tank water from following the bolt downward.
- Once the seal fails, water can travel along the bolt threads.
How Can You Tell the Bolt Is Really Leaking?
A true bolt leak begins directly beneath one of the tank mounting points. Water may follow the metal threads before forming a drop below the tank. A center gasket leak can travel sideways and make the same bolt appear wet even when the bolt washer is still sealing correctly.
- Dry everything completely.
- Wrap dry tissue around each bolt location.
- Leave the tank full without flushing.
- Check the tissue again.
- Then flush once.
A bolt that becomes wet while the toilet sits can have a washer leak. A center leak that appears mainly during flushing points more strongly toward the tank-to-bowl gasket.
How Does a Bolt Leak Progress?
Tank-bolt leaks usually begin slowly because only a small path opens beside the rubber washer. As the washer hardens or the hardware moves, the leak can increase. Corrosion can then make removal harder and raise the chance that the entire hardware set needs replacement.
| Stage | Visible Sign | Likely Condition | 2026 Cost |
|---|---|---|---|
| Early | Occasional drop | Slight seal loss | Low parts cost |
| Repeating | Bolt stays wet | Washer deterioration | $45 to $350 |
| Corroded | Rusted hardware | Hardware replacement needed | $45 to $350 |
| Cracked | Porcelain line stays wet | Tank replacement | $50 to $100 tank part |
The 2026 estimated cost range for repairing leaking tank bolts is about $45 to $350. The task normally takes about one hour when the hardware can be removed normally. A crack changes the repair completely because new washers cannot seal damaged porcelain safely.
What Are the Warning Signs Around Tank Bolts?
Tank-bolt leaks can remain hidden behind the bowl or beneath the tank. Regular inspection helps catch corrosion before the hardware becomes difficult to remove. Pay attention to moisture that returns after wiping the area dry.
- A drop forms directly below one bolt. The washer may have failed.
- Rust appears on the bolt. Water has been reaching the hardware.
- One side of the tank moves. The hardware may be loose.
- Water forms while the tank sits full. Standing water is passing a seal.
- The leak grows after flushing. Another tank seal may also be involved.
- The tank sits unevenly. Bolt pressure may not be balanced.
- A rubber washer looks cracked. Replacement is appropriate.
- The bolt spins during removal. Corrosion or damaged hardware may be present.
- Moisture appears around both bolts. The center gasket should also be checked.
- A hairline crack reaches the bolt hole. The porcelain may need replacement.
The most useful clue is the exact point where the first moisture appears.
Can You Stop the Leak by Tightening the Bolts?
Slightly loose hardware can sometimes stop leaking after careful adjustment. Tighten each side in small amounts and alternate between bolts. Stop once the tank is stable. Overtightening is dangerous because toilet porcelain does not flex like metal and can crack under concentrated pressure.
- Use minimal force.
- Do not tighten one side fully before the other.
- Watch the tank position.
- The tank should remain level.
- If the washer is cracked or hardened, extra pressure is not the right repair.
Replace the washer and associated hardware instead.
How Do You Replace Leaking Toilet Tank Bolts?
Replacing the hardware requires shutting off the toilet and draining the tank first. The old bolts are then removed while the tank is supported. New rubber washers must sit in the correct position inside the tank because that rubber creates the primary water seal.
- Turn off the water.
- Flush the toilet.
- Remove remaining tank water with a sponge.
- Disconnect the supply when needed.
- Hold the bolt head steady.
- Loosen the nut underneath.
- Lift the tank only when the repair requires access to the gasket.
- Remove old hardware.
- Clean the sealing surface.
- Install the replacement washers as directed by the hardware manufacturer.
- Tighten each side gradually.
- Do not force the porcelain together.
Current 2026 repair guidance recommends replacing damaged nuts or washers rather than relying on overtightening.
Should You Replace the Tank-to-Bowl Gasket Too?
Replacing the center gasket can make sense when the tank has already been removed and the existing gasket is compressed or worn. The tank-to-bowl gasket seals the large flush opening. Its failure can create water below the tank that is easily mistaken for bolt leakage. Korky recommends replacing tank hardware and the tank-to-bowl gasket when the joint is already leaking and the sealing components show wear.
This approach reduces the chance of reinstalling the tank over an old compressed gasket.
- Match the replacement gasket to the specific toilet.
- Different manufacturers can use different gasket shapes.
- Do not assume every universal part fits every tank.
What DIY Test Should You Do After the Repair?
A repaired tank should remain dry while full and during several flush cycles. Test both conditions before leaving the toilet unattended. A dry paper towel placed beneath each bolt makes a very small leak easier to detect than watching the hardware alone.
- Refill the tank.
- Do not flush for ten minutes.
- Check beneath each bolt.
- Then flush once.
- Dry the area again.
- Repeat the flush.
- Check the center tank connection.
The repair is successful only when the hardware stays dry during standing and flushing conditions.
When Should You Call a Professional?
Professional help is appropriate when bolts are badly corroded or the tank porcelain has cracked. It also makes sense when removal requires cutting hardware near the porcelain. The risk of breaking the tank increases when rust prevents controlled removal.
Tank-bolt repair costs about $45 to $350 in 2026. General toilet repair averages $271.
Stop DIY work when:
- A bolt cannot be loosened safely.
- The porcelain has a visible crack.
- The tank shifts after tightening.
- New washers still leak.
- The shutoff valve does not work.
- Water appears from the center gasket as well.
Replacing toilet bolts is straightforward only when the surrounding porcelain and connections remain in good condition.
How Can You Prevent Tank-Bolt Leaks?
Avoiding excess tank movement protects both the bolt washers and center gasket. Check the hardware when you first notice wobbling. Early correction requires less force than waiting until rubber seals lose compression or metal parts become heavily corroded.
- Do not lean against the tank.
- Check for movement every few months.
- Look for rust below the tank.
- Wipe small moisture spots dry.
- Avoid aggressive tightening.
- Replace hardened washers instead of crushing them tighter.
Small hardware inspections can prevent a slow leak from reaching flooring.
Conclusion
A toilet leaking from tank bolts usually needs new sealing washers rather than more tightening force. Confirm the source with a dry-tissue test before removing hardware. Replace worn parts and tighten both sides gradually. Check the tank-to-bowl gasket while the connection is accessible. If corrosion prevents safe removal or a crack reaches the bolt hole, professional repair or tank replacement is the safer path.
Frequently Asked Questions
Why does only one toilet tank bolt leak?
The rubber washer on that bolt may have failed while the other washer still seals normally.
Can I use sealant around the tank bolt?
Sealant should not replace the correct rubber washer. The mechanical seal needs to be assembled properly.
Why did new tank bolts start leaking?
A washer can be installed incorrectly or the tank can be tightened unevenly. The center gasket should also be checked.
Should tank bolts be extremely tight?
No. They should hold the tank stable without excessive force. Overtightening can crack porcelain.
Why does the bolt leak only during flushing?
The water may actually be coming from the tank-to-bowl gasket and traveling toward the bolt.